In the last blog we saw how to consume REST APIs in D365 Finance and Supply Chain. In this blog, we will cover how to consume D365 Finance and Supply Chain’s REST API – and the advantage we have with OData.
OData is a standard protocol for creating and consuming data. The purpose of OData is to provide a protocol that is based on Representational State Transfer (REST) for create, read, update, and delete (CRUD) operations. OData applies web technologies such as HTTP and JavaScript Object Notation (JSON) to provide access to information from various programs. OData provides the following benefits:
- It lets developers interact with data by using RESTful web services.
- It provides a simple and uniform way to share data in a discoverable manner.
- It enables broad integration across products.
- It enables integration by using the HTTP protocol stack.
D365 Finance and Supply Chain provides an OData REST endpoint. This endpoint exposes all the data entities that are marked as ‘IsPublic’ in the Application Object Tree (AOT). It supports complete CRUD (create, retrieve, update, and delete) functionality that users can use to insert and retrieve data from the system.
We will use Visual studio 2017 along with C# to demonstrate this. I will try to showcase the demonstration step by step:
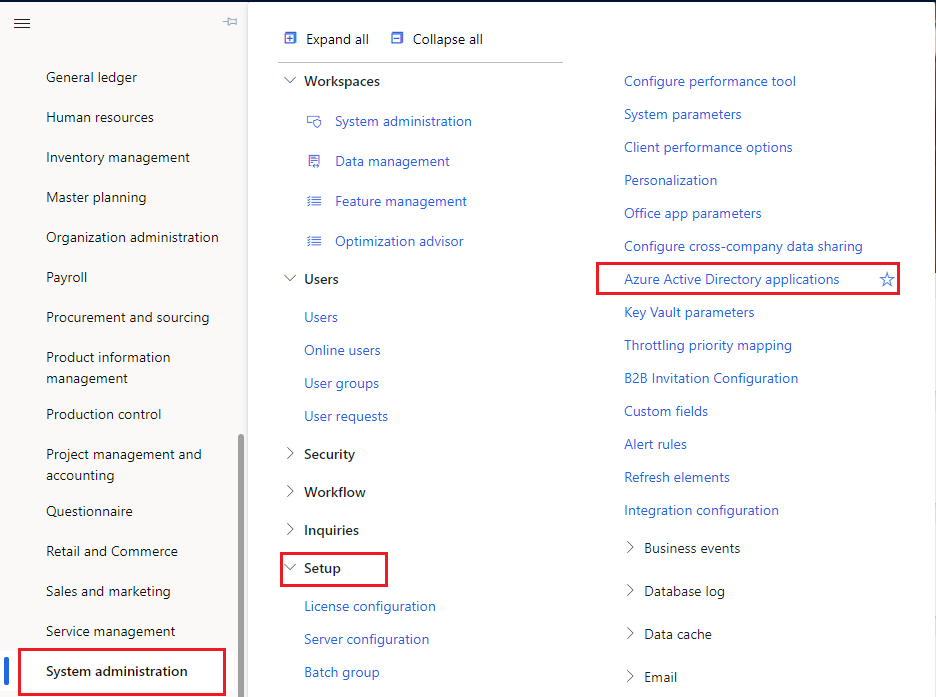
1. App Registration
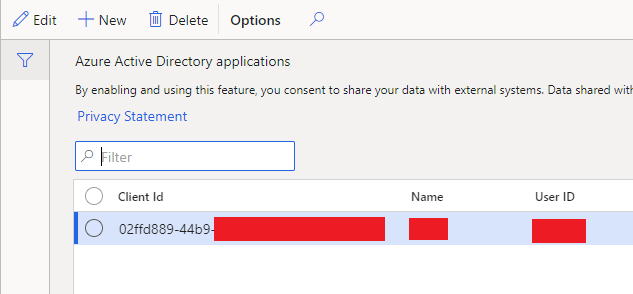
Before we start writing logic for consuming the API, the apps via which D365’s API is going to get consumed needs to be registered in Azure portal under same tenant where D365 resides. One will have to collaborate with tenant’s admin or azure global administration to get your application registered. From this registration you will get ‘ClientAppId’ and ‘ClientAppSecret’. Using ‘ClientAppId’ create a record in Azure directory application forms in your D365 instance with whom we will integrate. Form is located at:
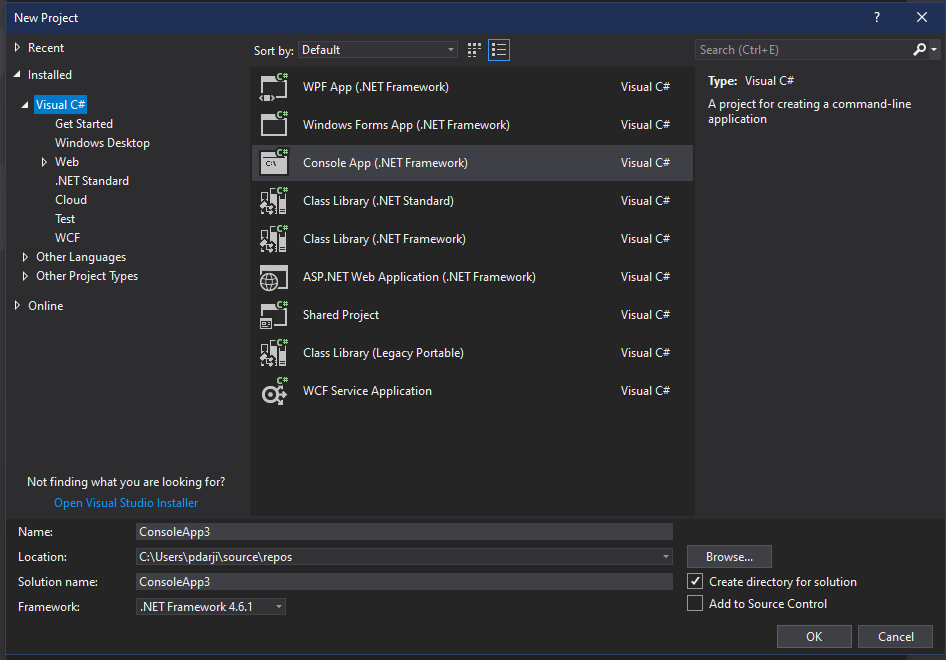
2. Create a C# console project in VS 2017
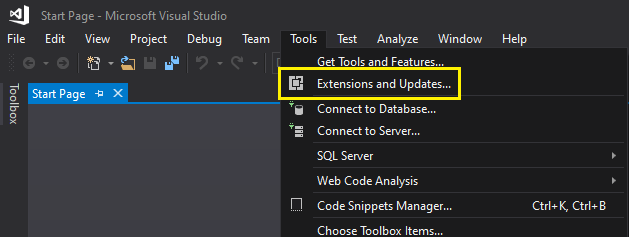
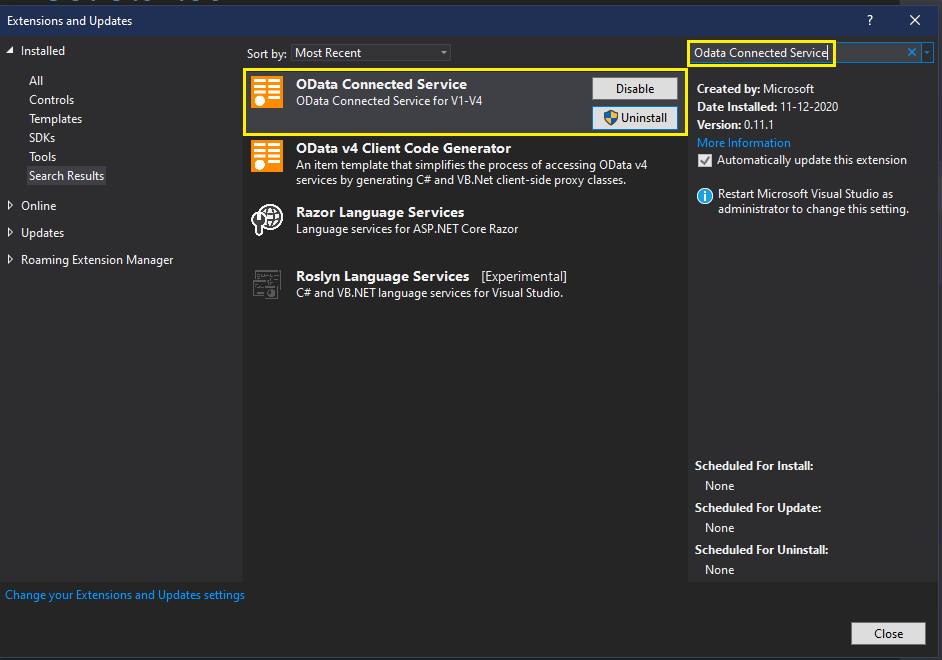
3. Add OData client extension in your project
Like how we create SOAP client while consuming SOAP web service, similarly we will create OData client to consume OData REST API. First, we need OData client extension in our project which is available via extension as:
Search and install OData Connected service extension as:
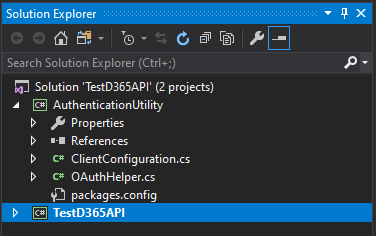
4. Adding and modifying AuthenticationUtility project
When we call the API, it needs to be authenticated. There are sample codes which we can use in our project. Grab the authentication utility project from
https://github.com/microsoft/Dynamics-AX-Integration/tree/master/ServiceSamples
and add this project to your solution. Once you add the project your solution explorer should look like:
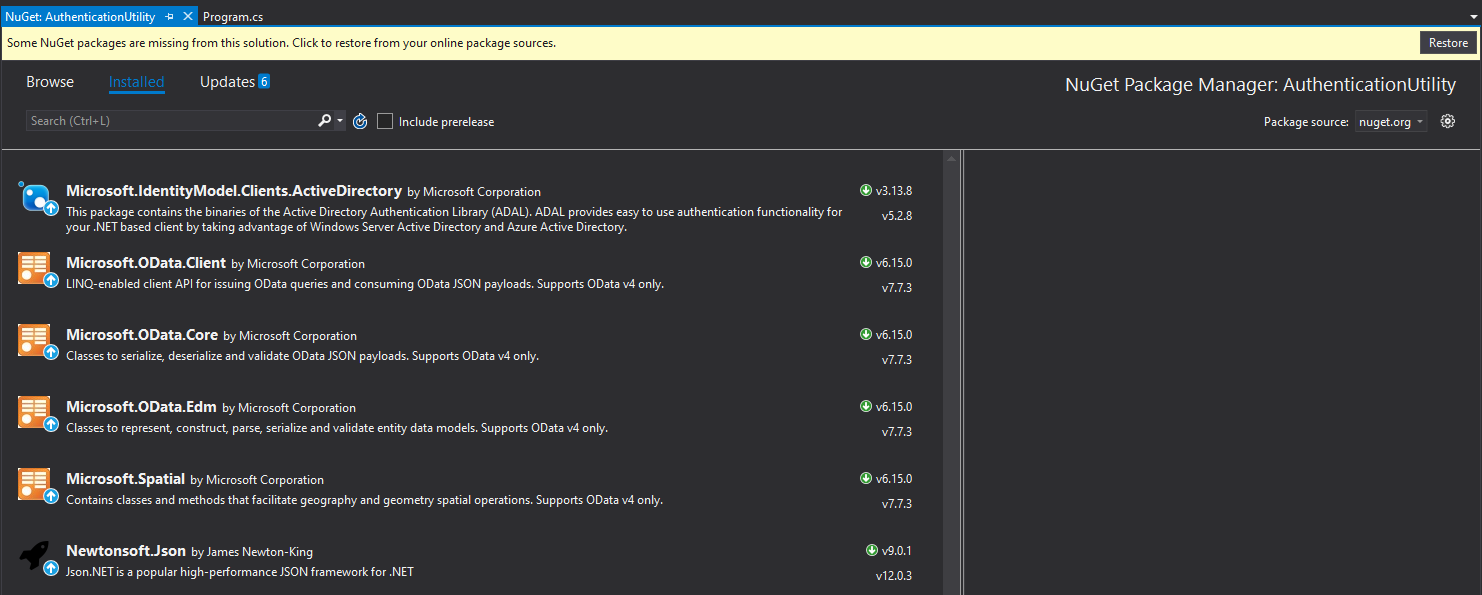
Expand authentication utility project, expand references, right click on references, and select Manage NuGet Packages. Click on ‘Restore’ button.
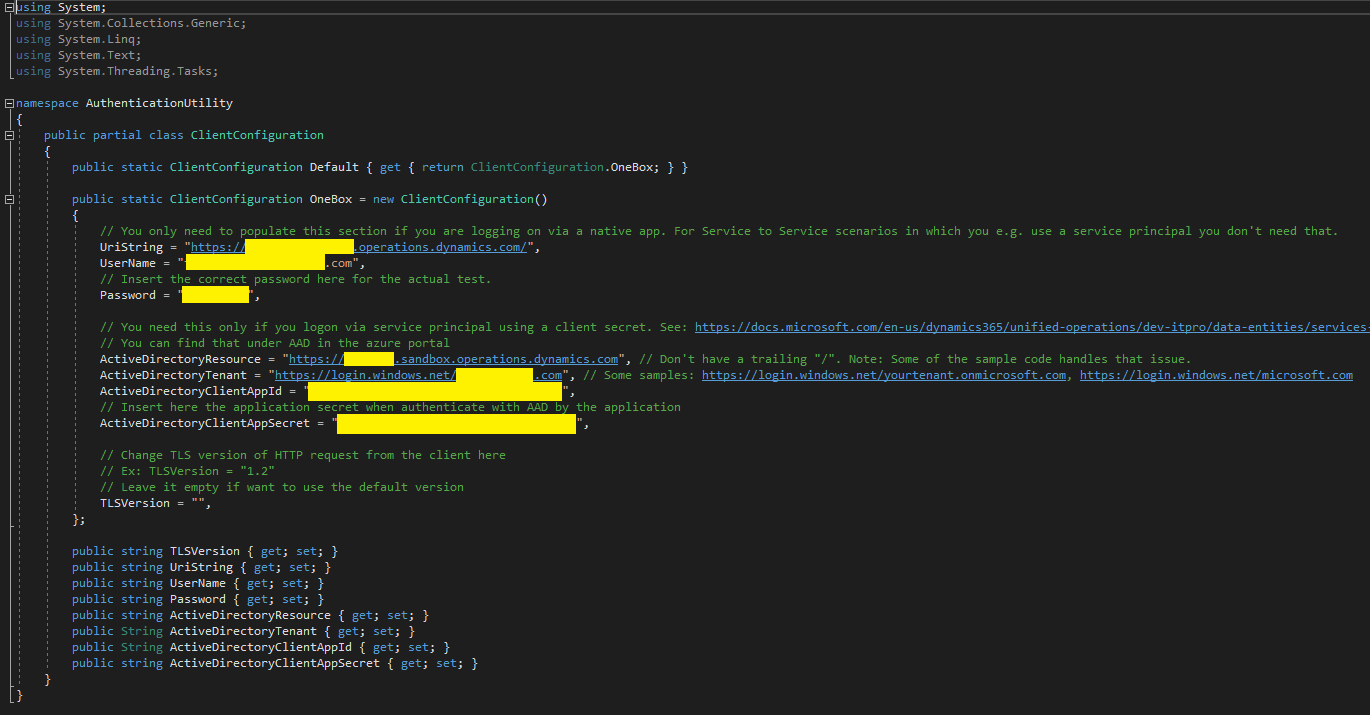
Now open ClientConfiguration.cs file and modify its content for:
UriString – Your D365 instance base url with trailing ‘/’
UserName – Username
Password – Password of the user
ActiveDirectoryResource – Your D365 instance base url without trailing ‘/’
ActiveDirectoryTenant – your tenant url
ActiveDirectoryClientAppId – ClientAppId value which we collected in Step 1
ActiveDirectoryClientAppSecret – ClientAppSecret value which we collected in Step 2
Save the project by pressing Ctrl+S.
5. Adding connected service via OData client
Right click on your console project and add connected service
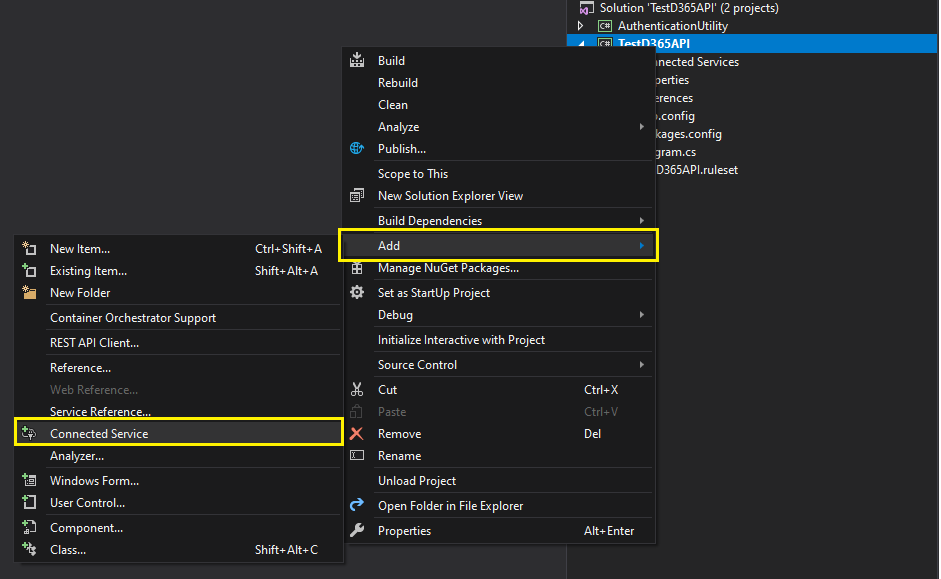
Select OData Connected service option
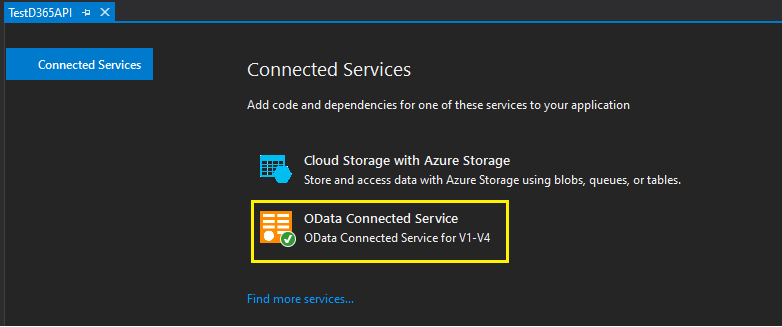
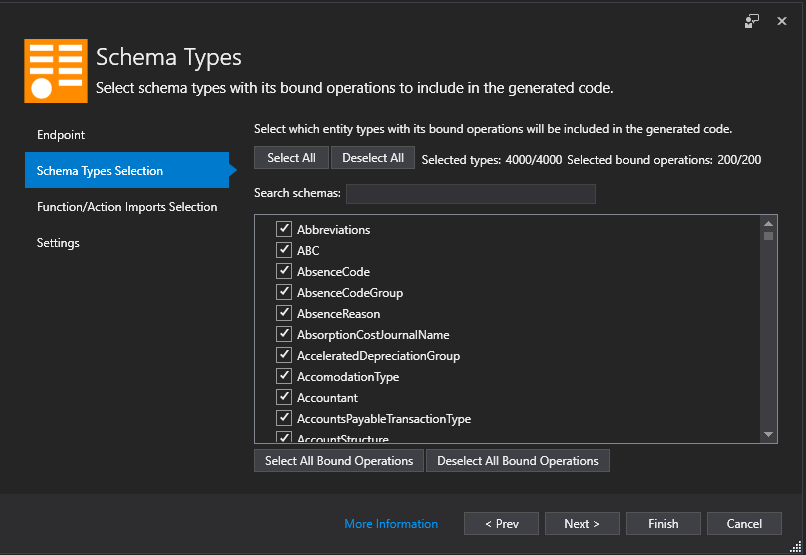
You will be presented with a wizard in which we have to specify various values. Once done it will add all the relevant artefacts to our console project.
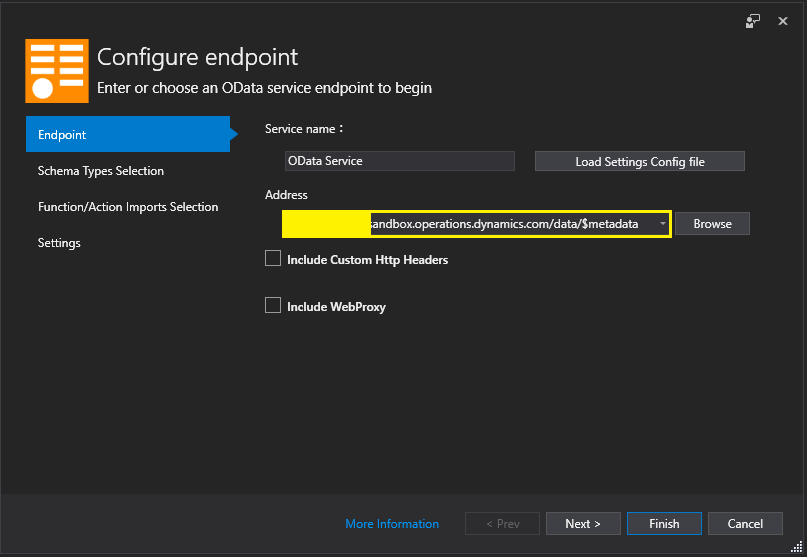
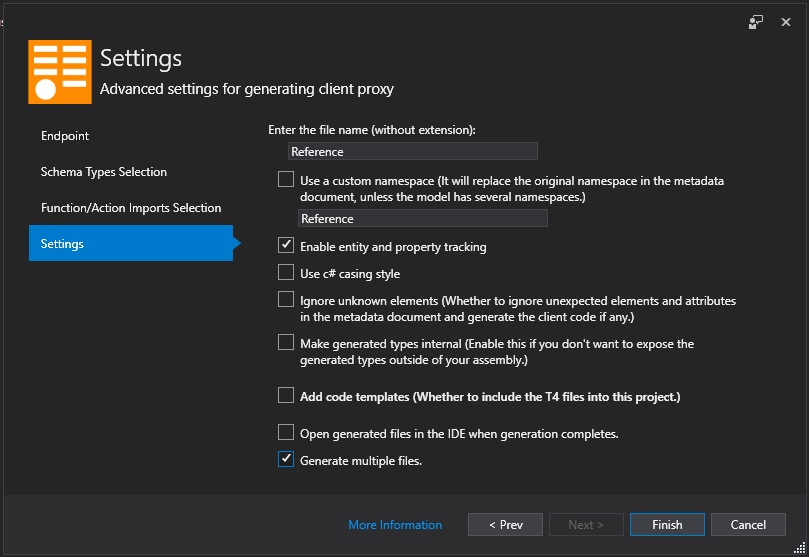
Once you click Finish, it will download the artefacts and create .cs file for each service we have in D365 Finance and Supply Chain. This process can take 10-30 min.
6. Authenticating and calling the service
Now that all our perquisites are complete, we can go ahead and write the actual API calls in our C# project. Refer below screenshot of code and I will try to explain its section below.
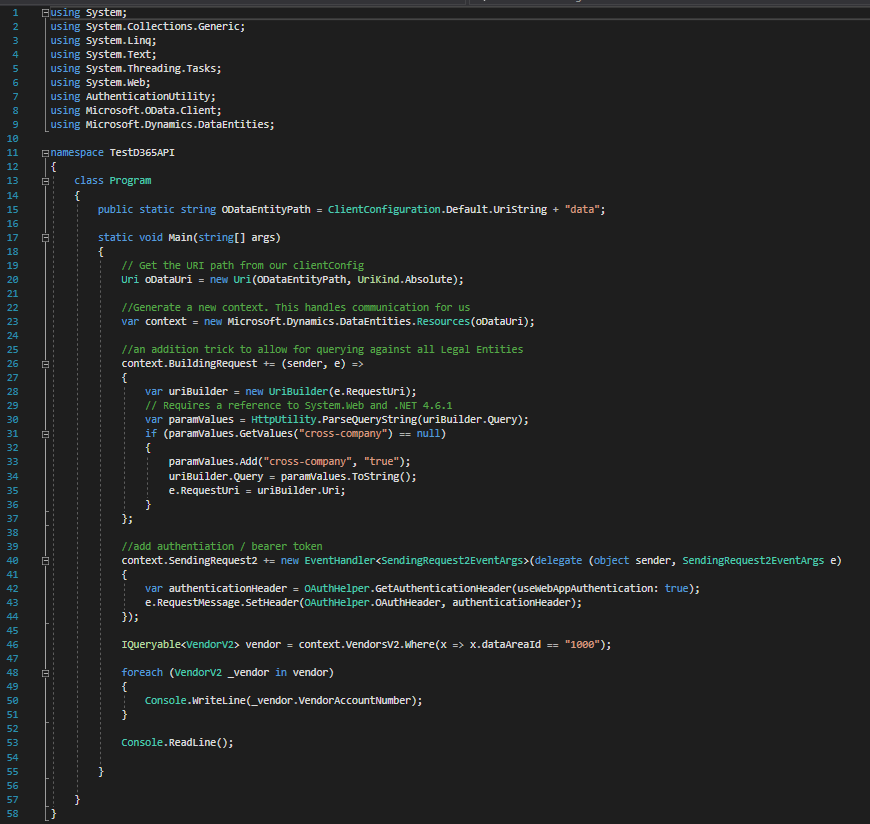
Line#7 – Line#9: Providing references to relevant namespaces so that we can use the classes residing in those namespaces.
Line#15: string declaration holding uri value
Line#20 – Line#37: Creating Uri object so that we can set the context of the call. In this context we will set cross-company parameter are try so that we can fetch the data across the legal entities.
Line#40 – Line#44: Creating and setting the header with values related to application id, application secret, tenant, etc. If we recollect, we have setup this earlier in Step 4. Here we are just calling that information and passing it to relevant classes.
Line#46 – For this demonstration we will VendorV2 entity. We will try to fetch all the vendors for legal entity ‘1000’. You may choose any legal entity from available list from your D365 instance. We are declaring IQueryable object of VendorV2 entity as we will get multiple values and we need to loop on it. As you can see the statement is very much like how we write SQL statements i.e., a select statement, a where condition etc.
Line#48 – Line#51: Actual for statement in which we loop on fetched records and print it on screen
If you have done setup and written logic correctly console will display the fetched vendors id values.
Summary
Like every problem has multiple solutions, there are various ways to call D365 Finance and Supply Chain REST API. One can experiment and have its own suitable logic to consume the API. Also C# has various support for OData which makes life easier for developers to consume the API and use it.
But if I tell you that Microsoft has given us a more advanced option where there is no need to write code to consume the API? Will it not be a wonderful thing where not only developers, but other business users also create their own app to consume the data from D365 Finance and Supply Chain via integration? Power Platform is the name where we can do such things.
Stay tuned for my next blog where we explore the Microsoft Power Platform to integrate with Dynamics 365 Finance and Dynamics 365 Supply Chain Management .
Happy DAXing!!