In Dynamics NAV 2018, the computer vision API is now embedded and available for consumption on the Item and Contacts card. The Image Analyzer extension uses the Computer Vision API from Microsoft Cognitive Services to identify attributes in images attached to Items.
To start with, we need to have the Computer Vision API, either as a free trial or in the Azure portal if we have an Azure subscription. Once we have the Computer Vision API, we are ready to start analyzing pictures from the Item or Contact cards in Dynamics NAV 2018.
We can analyze items to a certain limit during a specific period. Image Analyzer runs each time when we import an item or contact. After import, we can see the attributes, confidence level of an image that we have selected.
Requirements
There are a few requirements for the images:
- Image formats: JPEG, PNG, GIF, BMP
- Maximum file size: Less than 4 MB
- Image dimensions: Greater than 50 x 50 pixels
How to enable Image Analyzer
There are two ways to activate Image Analyzer in Dynamics NAV 2018.
- Before importing an Image to Items or Contacts.
- After importing an Image to Items or Contacts.
1. Before importing an Image
To enable the Image Analyzer extension, perform below mentioned steps:
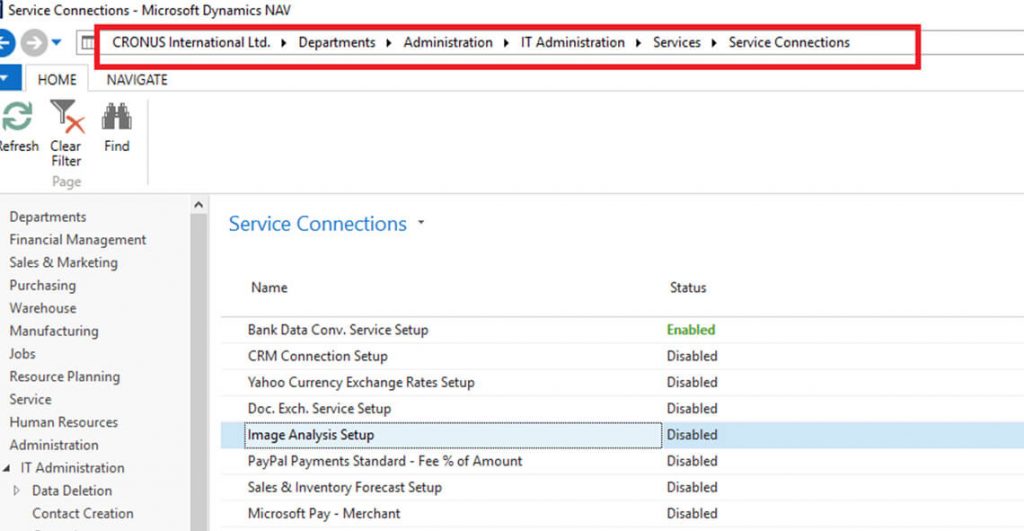
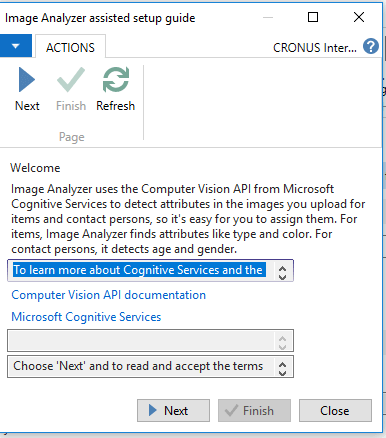
- Open Service Connections, and then choose Image Analysis Setup. Choose the Enable Image Analyzer check box and then complete the steps in the assisted setup.
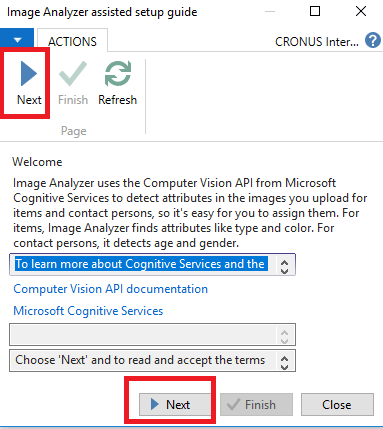
Select Next
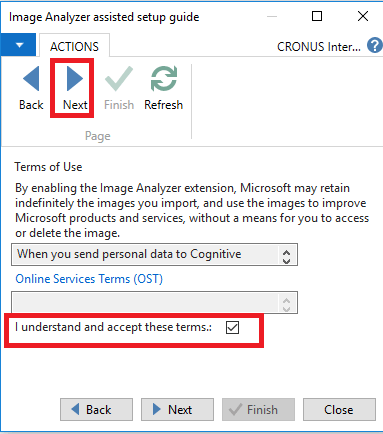
Select next after accepting the Terms:
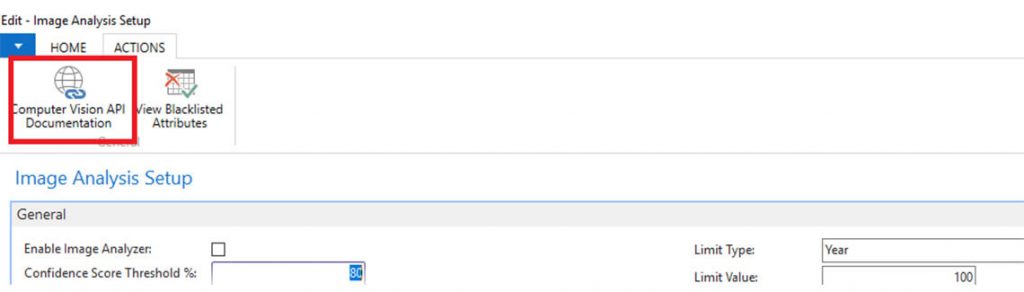
For URL and Key, Click on Computer Vision API Documentation
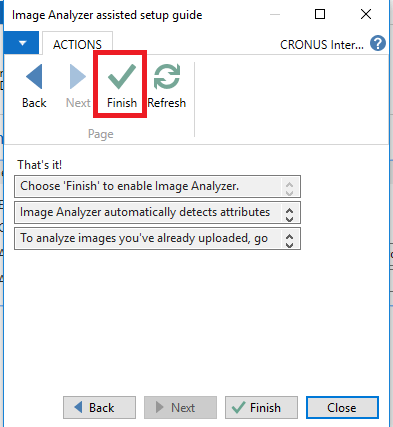
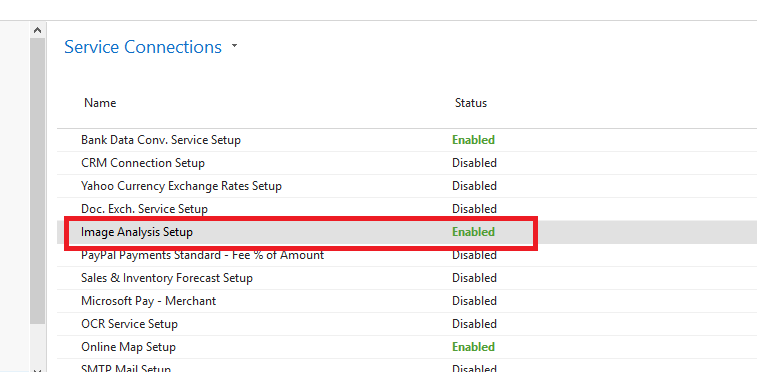
Status of Image Analysis Setup on Service Connections has been successfully enabled as shown in the below screen shot:

2. After importing an Image:
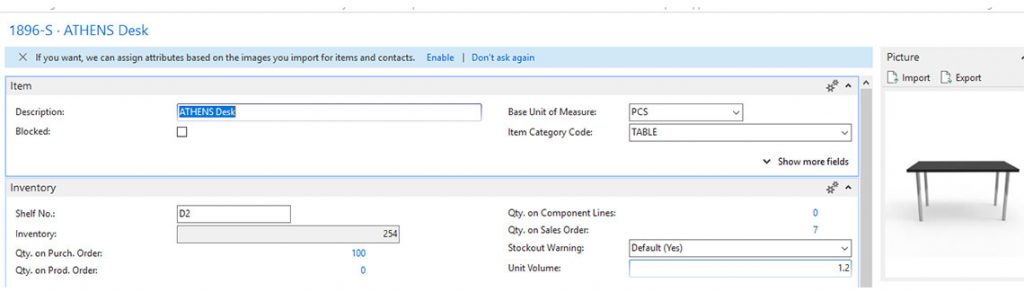
It might be possible that there are some items or contacts on which images are already imported before activating Image Analyzer. In this case, we can activate Image Analyzer from Item card page. When we click on particular item, we will get notification as shown in the following screen and we just need to enable it.
Then, system will lead through enabling wizard same as we get in the service connection setup. We need to perform the same steps.
Status of Image Analysis Setup on Service Connections has been successfully enabled as shown in the below screen shot:
To analyze an image of an item
The following steps describe how to analyze an image:
- Select Items, and then choose the related link.
- Upload an image to the item if it is not uploaded.

- Import the below picture.

- System will import picture on Item and it will appear in the right side of the item card.
- Click on Analyze Picture on Actions tab.
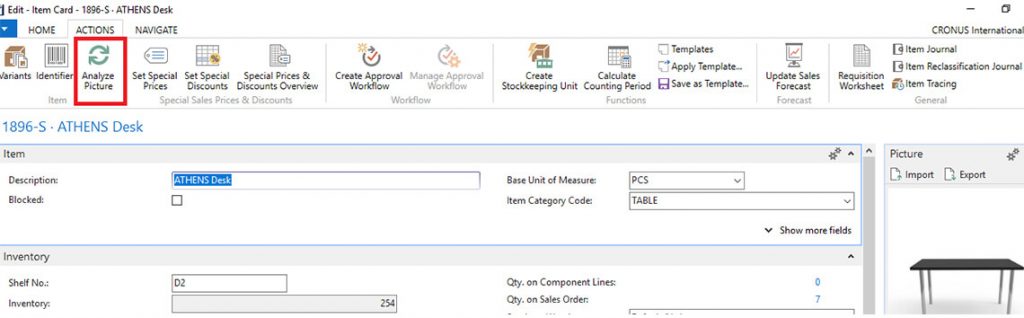
- As soon as we click on this button, system will analyze the Image and suggest with attributes.
- The Image Analyzer Attributes page displays the detected attributes, the confidence level, and other details about the attribute. We can use the ‘Action to perform’ options to specify what to do with the attribute.

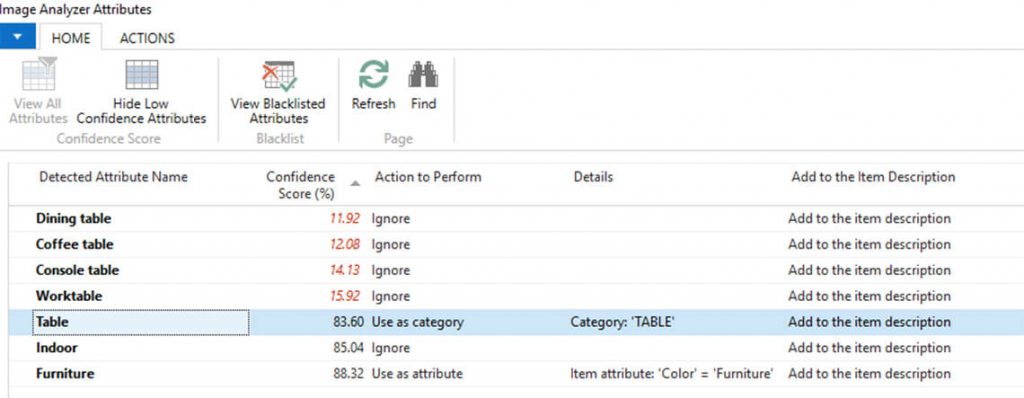
- We can find all detected attributes if we click on a View All Attributes.
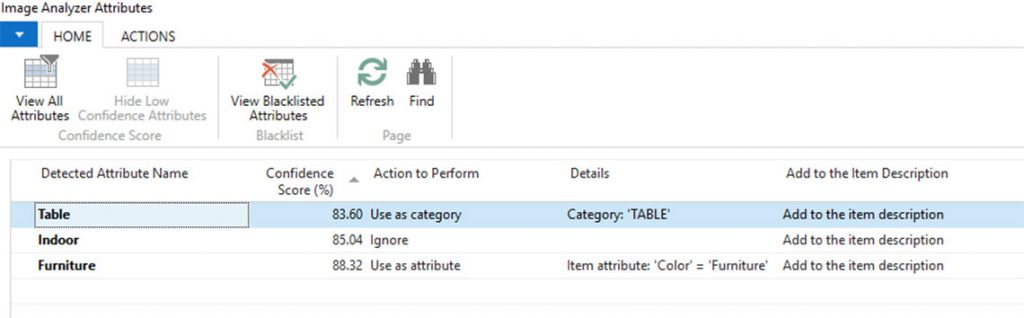
- Image Analyzer page will display all the detected attributes. Attributes which are low confidence score will be displayed in Red.
To analyze an image of Contact
The following steps describe how to analyze an image:
- Select Contact, and then choose the related link.
- Upload an image to the item if it is not uploaded.
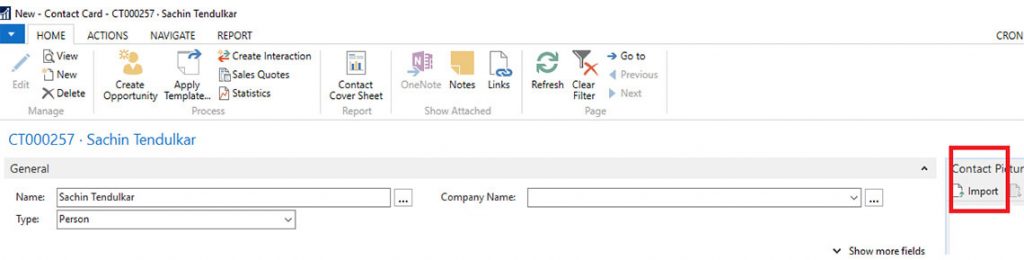
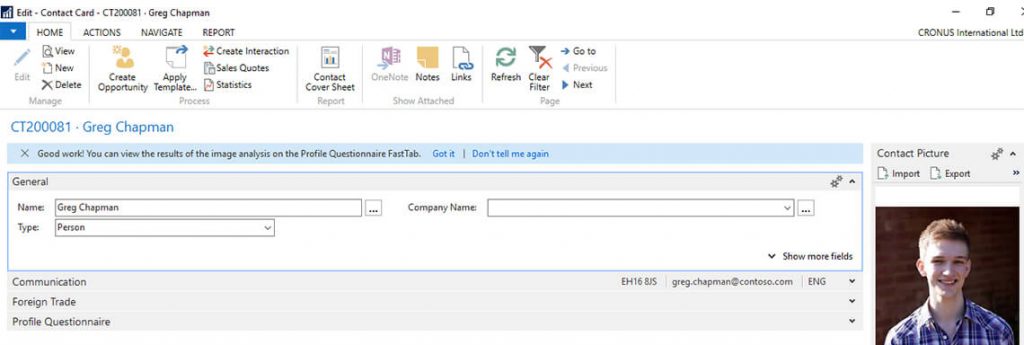
System will display notification on the contact card as shown in the below screenshot:
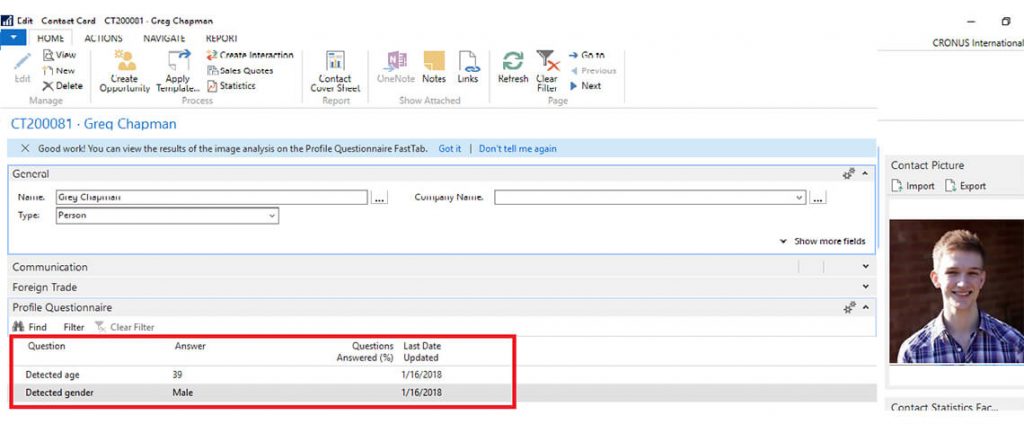
- System shows the result of image analysis on the Profile Questionnaire fast tab.
- Image Analyzer detect contact person’s gender and age.
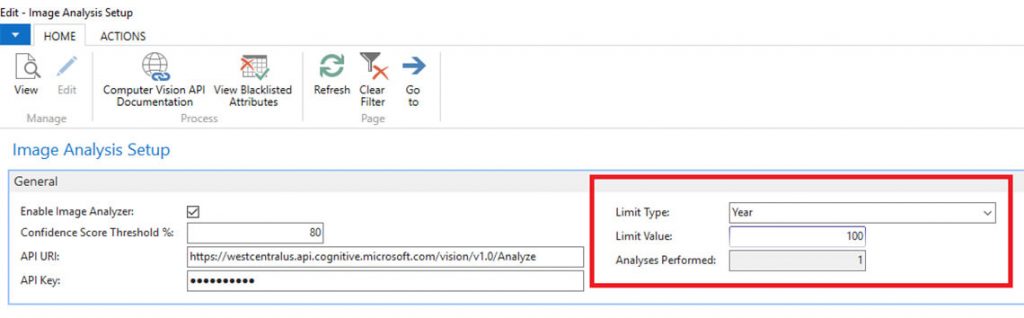
How many analysis left in the current period
We can view the number of analyses done so far, and how many left in the current period.
- Choose Image Analyzer Setup, and then choose the related link.
- The Limit type, Limit value, and Analyzes performedprovide the usage information.
To stop using the Image Analyzer extension
- Choose Service Connections, and then choose Image Analyzer Setup.
- Clear the Enable Image Analyzercheck box